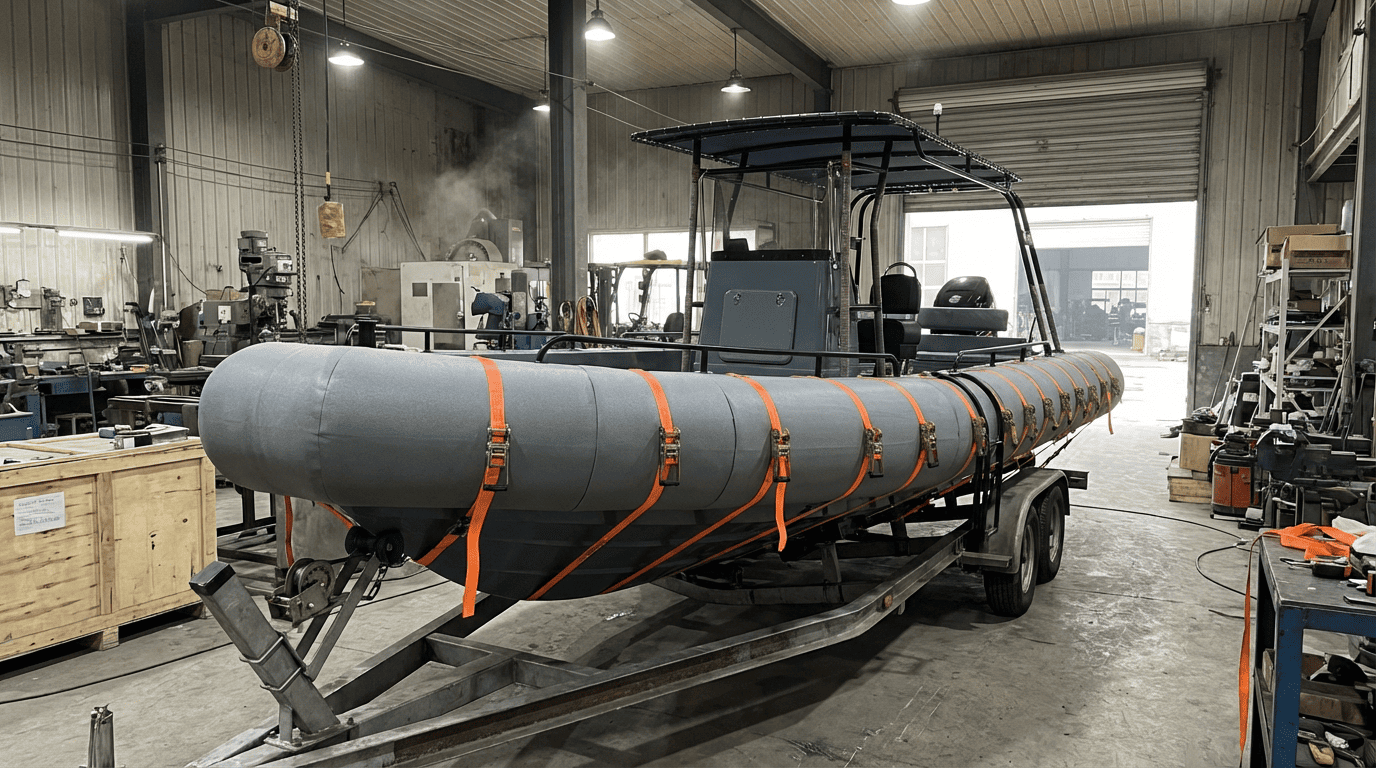
Installing a foam collar might seem daunting, but it is just like any other marine upgrade—preparation is key.
A successful installation relies on two things: a clean hull surface1 and the right fixation method while the adhesive cures. Whether you are refitting an old RIB or outfitting a new workboat, following these steps ensures a bond that lasts for years.
Let’s walk through the process so you can get it right the first time.
What tools and materials are needed for foam collar installation2?
You don't need a heavy machinery workshop, but you do need the right supplies to ensure a professional finish3.
Gathering everything beforehand saves you from scrambling when the glue is already open. You will need cleaning solvents4, abrasives5, and most importantly, the right adhesive and strapping gear.
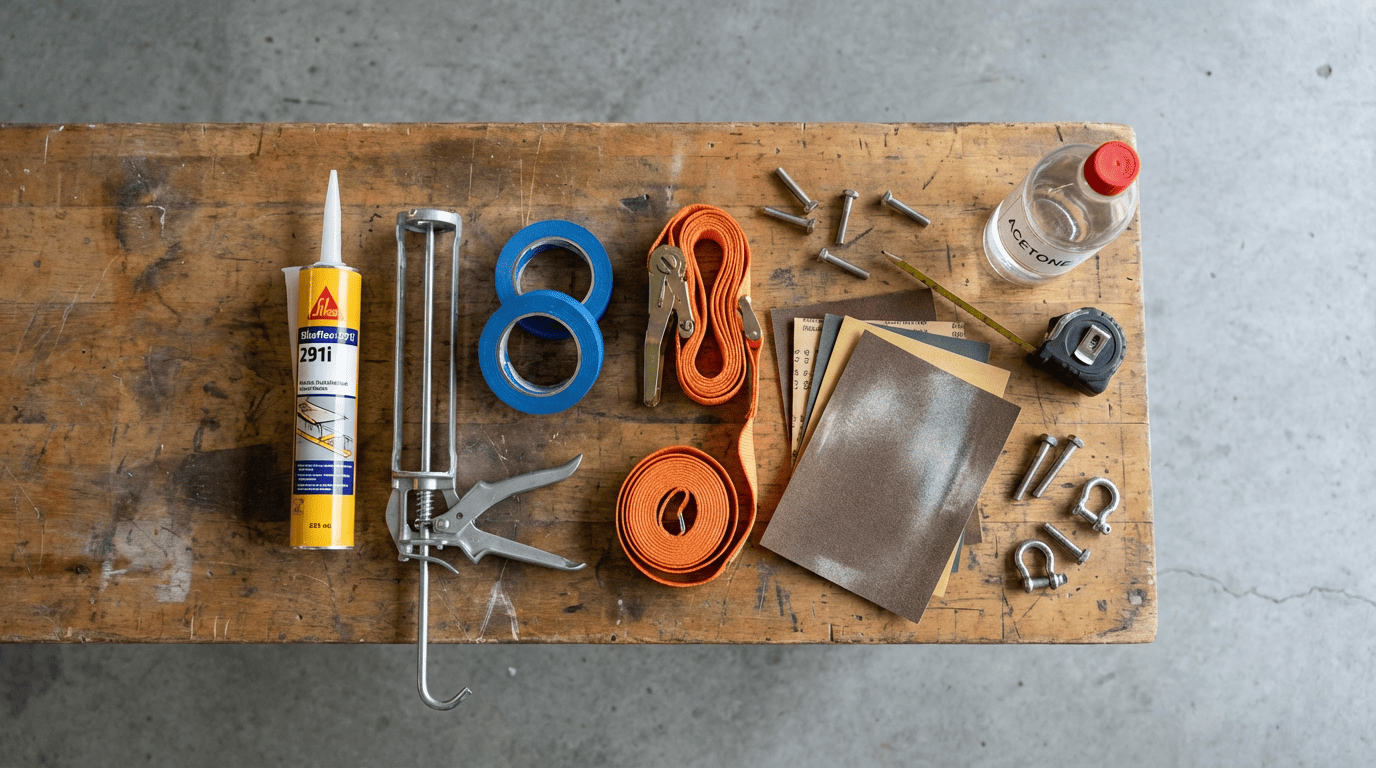
To do this job well, you need to be prepared. Here is a checklist of what we usually recommend to our clients:
Essential Tools
- Cleaning Solvent: Acetone or a specialized hull cleaner to remove wax and grease.
- Sandpaper: 40-80 grit for roughing up the hull surface.
- Measuring Tape & Marker: For precise alignment.
- Caulking Gun: High-quality, for dispensing the adhesive smoothly.
- Straps or Tape: This is crucial. For lighter collars, heavy-duty masking tape might work. For heavier foam collars, you will need ratchet straps or packing straps.
The Adhesive Question
A lot of customers ask if we supply the glue with our collars. Generally, we do not supply the glue.
Why? Because shipping chemicals internationally is complicated and often unnecessary. We strongly recommend using Sikaflex marine-grade adhesive6. Sika is a global brand. You can walk into almost any marine supply store in South Korea or elsewhere and find it. It is reliable and fresh.
However, if a client specifically wants a lower-cost alternative and asks us to source a "flat replacement" from China, we can do that. But for quality assurance and ease, buying local Sikaflex is your best bet.
How to prepare the hull: Cleaning and sanding for adhesion?
If the surface isn't prepped, the best glue in the world won't hold.
The hull must be free of all contaminants and physically roughened to create a mechanical bond. Think of it like painting; 90% of the work is in the prep.
I have seen installations fail simply because someone skipped the sanding or didn't wipe down the dust properly.
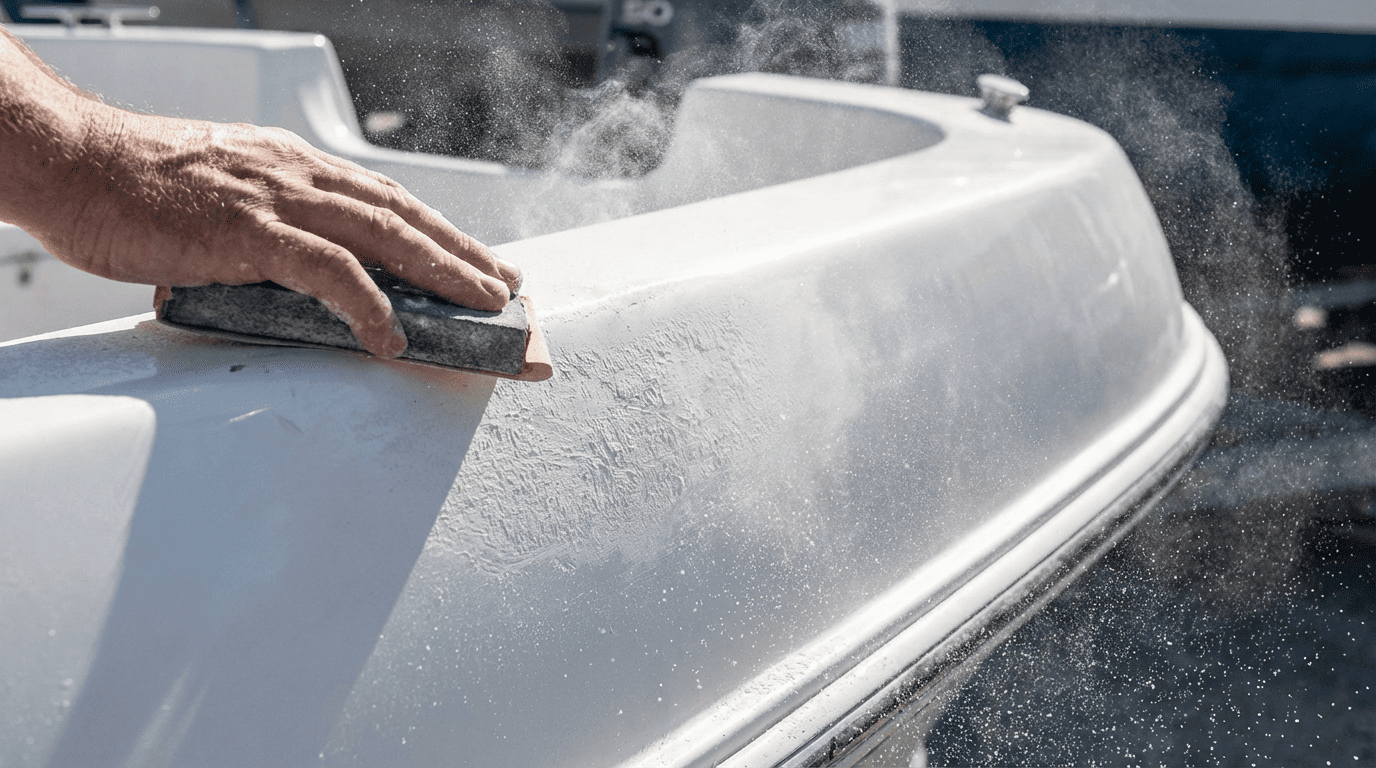
Cleaning
First, wash the hull area thoroughly. Remove any barnacles, old glue, or dirt. Once it is dry, wipe it down with acetone. This removes the invisible oils and mold release agents that come on new fiberglass hulls.
Sanding
Next, you need to sand the area where the collar will sit. You want a rough, matte finish, not a smooth one. This gives the adhesive something to "bite" into. Use 40 to 80 grit sandpaper.
Final Wipe
After sanding, vacuum up the dust and wipe it down with solvent one last time. Do not touch the clean surface with your bare hands—the oils from your skin can weaken the bond.
How to measure and cut foam for a perfect fit?
A collar that is too long or too short will cause headaches during the gluing process.
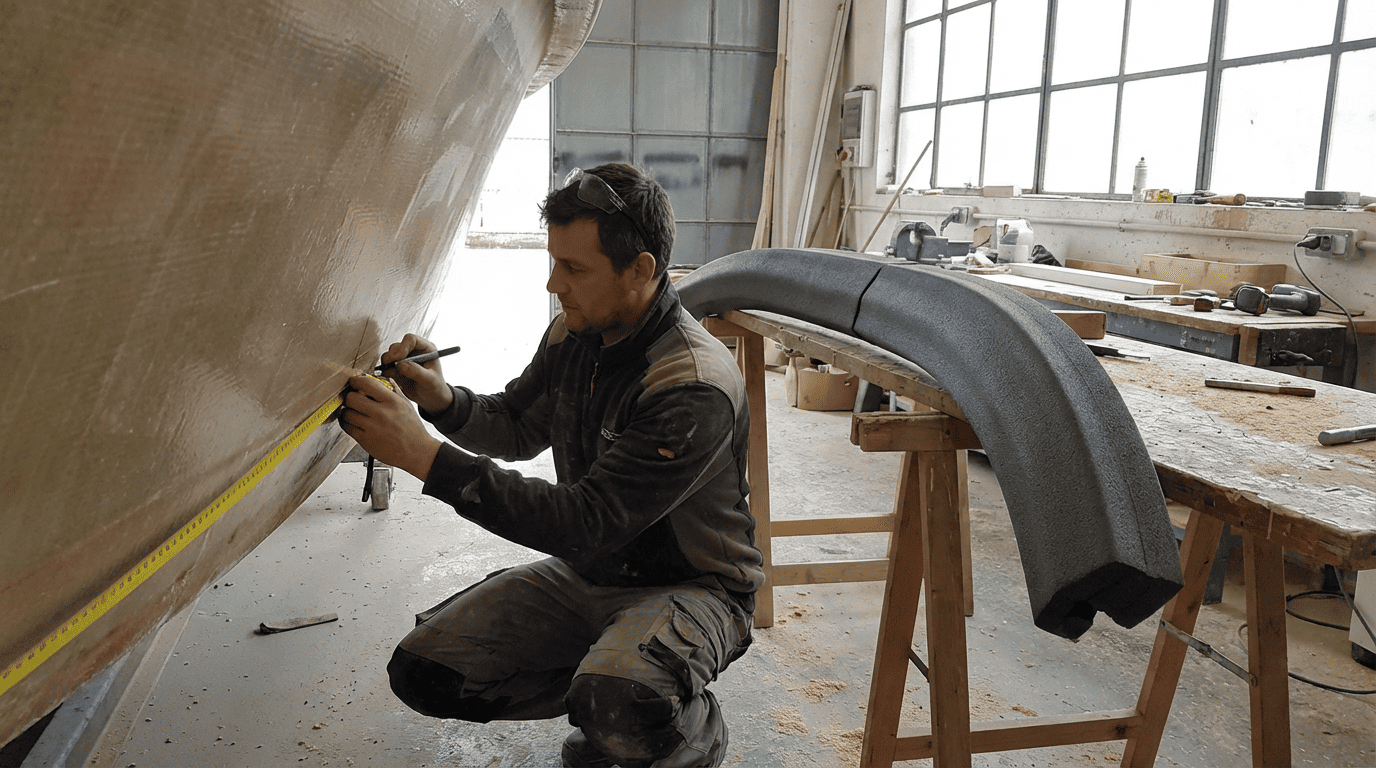
Measure twice, cut once—it is the oldest rule in the book for a reason. You need to dry-fit the collar against the hull before you even think about opening the glue.
Getting the fit right is about patience.
Dry Fitting
Hold the collar up to the boat. If it is a multi-piece collar, check how the segments align. Use masking tape to mark the top and bottom edges on the hull so you know exactly where to spread the adhesive later.
Cutting
If you need to trim the length, use a sharp knife or a fine-toothed saw. Make sure the cut is straight. If you are joining two pieces, ensure the faces meet flush without gaps.
Allow for Compression
Remember that when you strap the collar down, it might compress slightly. Ideally, you want a snug fit that doesn't require excessive force to hold in place, but isn't loose either.
Gluing vs. mechanical fastening: Which method is best?
Most modern foam collars rely primarily on high-strength adhesives, sometimes backed up by mechanical fasteners.
For most RIBs and workboats, a full adhesive bond is superior because it spreads the load evenly across the hull. Mechanical fasteners create stress points and require drilling holes in your hull.
The Adhesive Advantage
Gluing distributes the impact energy over the entire surface area. It seals the interface between the collar and the boat, preventing water from getting behind it.
When to use Mechanical Fasteners?
Sometimes, for very heavy-duty applications or specific hull shapes, you might use an aluminum track or bolts. But for the majority of retrofits and new installs we see, Sikaflex is more than enough. It simplifies the design and reduces the risk of leaks into the hull.
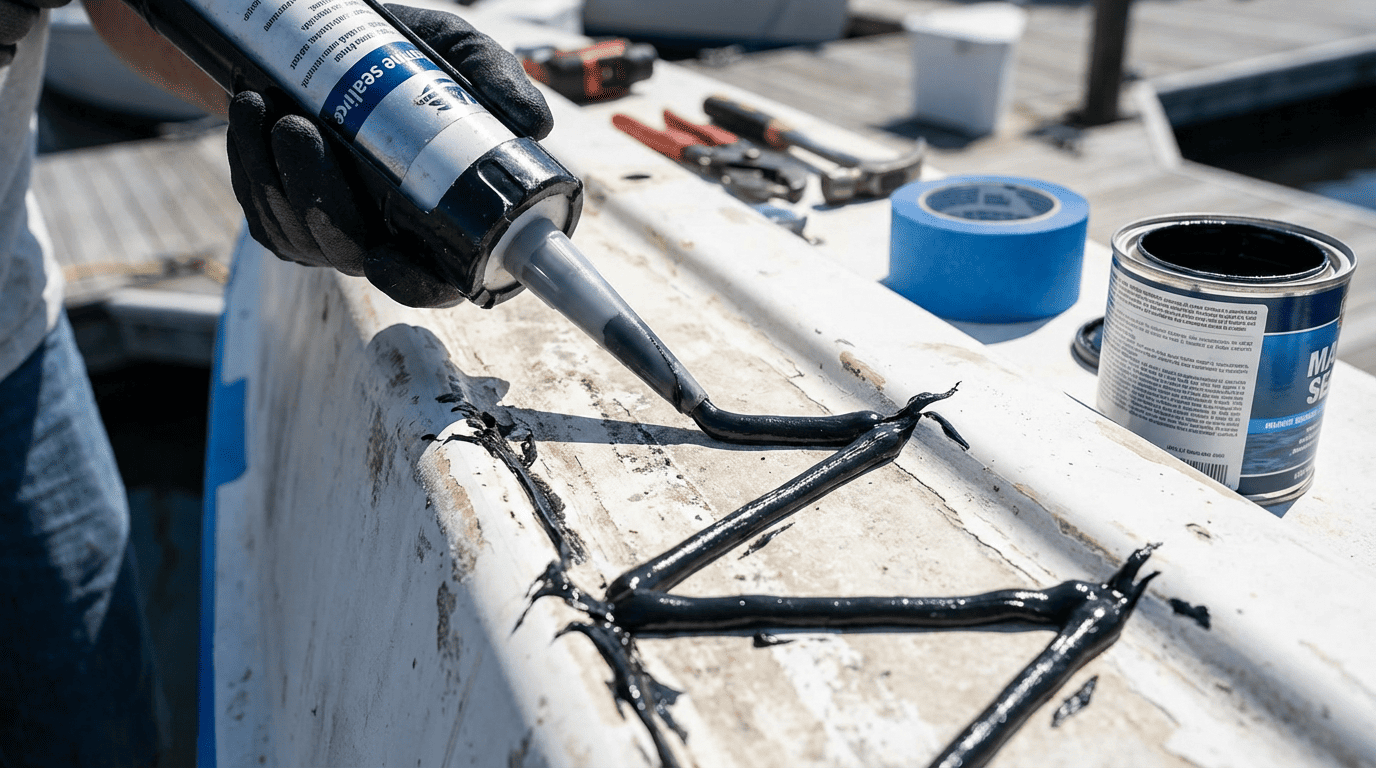
Application Tip
Apply the adhesive in vertical beads or a zig-zag pattern on the hull within your marked lines. Do not apply it in horizontal lines that could trap water.
What about curing times and finishing touches?
This is the part where "gravity" becomes your enemy, and you need a strategy to fight it.
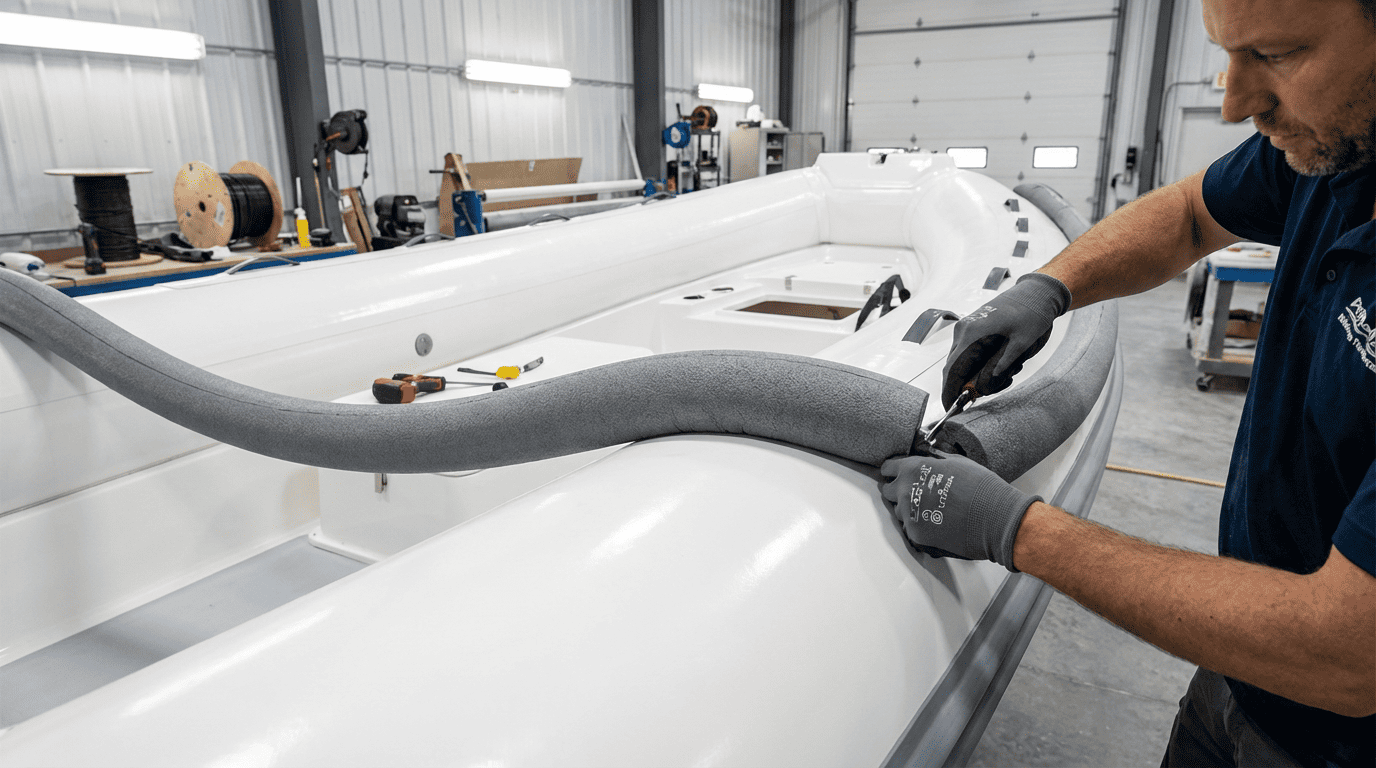
Just like using liquid nails to hang a shelf, the foam collar has weight. You must mechanically support it while the glue cures, or it will slide right off.
This is a critical insight I share with all my clients. The glue is slippery when wet.
Fixation is Key
As I mentioned earlier, foam collars have self-weight. Even the lightweight ones.
- Light Collars: You might get away with using strong duct tape or masking tape to hold them in place.
- Medium to Heavy Collars: Tape won't cut it. You need to use ratchet straps or packing straps. Wrap them around the entire hull and collar. Tighten them enough to hold the collar firmly against the glue, squeezing out air pockets, but not so tight that you deform the foam permanently.
Curing Time
Check the Sikaflex datasheet. Usually, it needs 24 to 48 hours to cure fully, depending on humidity and temperature. Do not rush this. Leave the straps on until the glue is fully set.
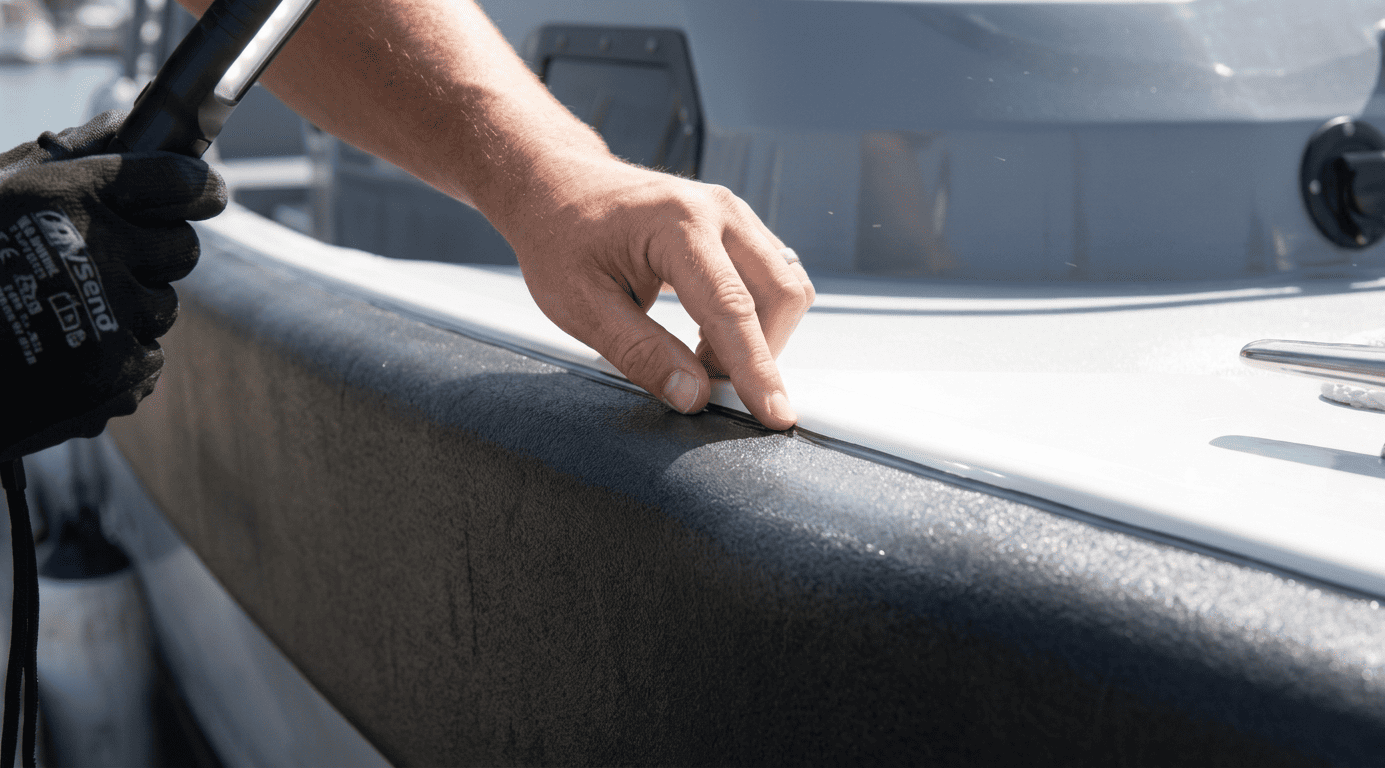
Finishing
Once cured, remove the straps. You might see some excess glue7 squeezed out at the edges. Trim this with a razor blade or smooth it out with a tooling stick for a neat look.
What are common installation mistakes to avoid?
I want you to succeed, so let's look at where things usually go wrong.
The biggest failures come from rushing the prep work or disturbing the bond before it has cured. Avoid these traps to ensure your collar stays put for the long haul.
Shortcuts in Prep
Skipping the acetone wipe or sanding? The collar might fall off in a month. Do not skip steps.
Inadequate Support
This is the most common one. Thinking the glue is "sticky enough" to hold the weight immediately. It isn't. If you don't strap it down well, the collar will slide down a few centimeters before it dries, and it will be impossible to fix without tearing it off.
Wrong Temperature
Try to install in a controlled environment. If it is too cold, the glue won't cure. If it is too hot or humid, it might cure too fast.
Conclusion
Installing a foam collar is a straightforward job if you respect the materials. Clean well, sand well, and most importantly, strap it down tight until the glue does its work.
Learn the essential steps to prepare your boat's hull for repairs, ensuring a strong bond. ↩
Explore expert tips and techniques to ensure a successful foam collar installation on your boat. ↩
Get tips on achieving a professional finish in your boat repair projects. ↩
Find out which cleaning solvents effectively prepare your boat hull for adhesive bonding. ↩
Get insights on the best abrasives to use for sanding your boat hull for optimal adhesion. ↩
Discover why Sikaflex is the preferred choice for marine adhesive applications. ↩
Learn how to properly manage excess glue for a clean and professional finish. ↩