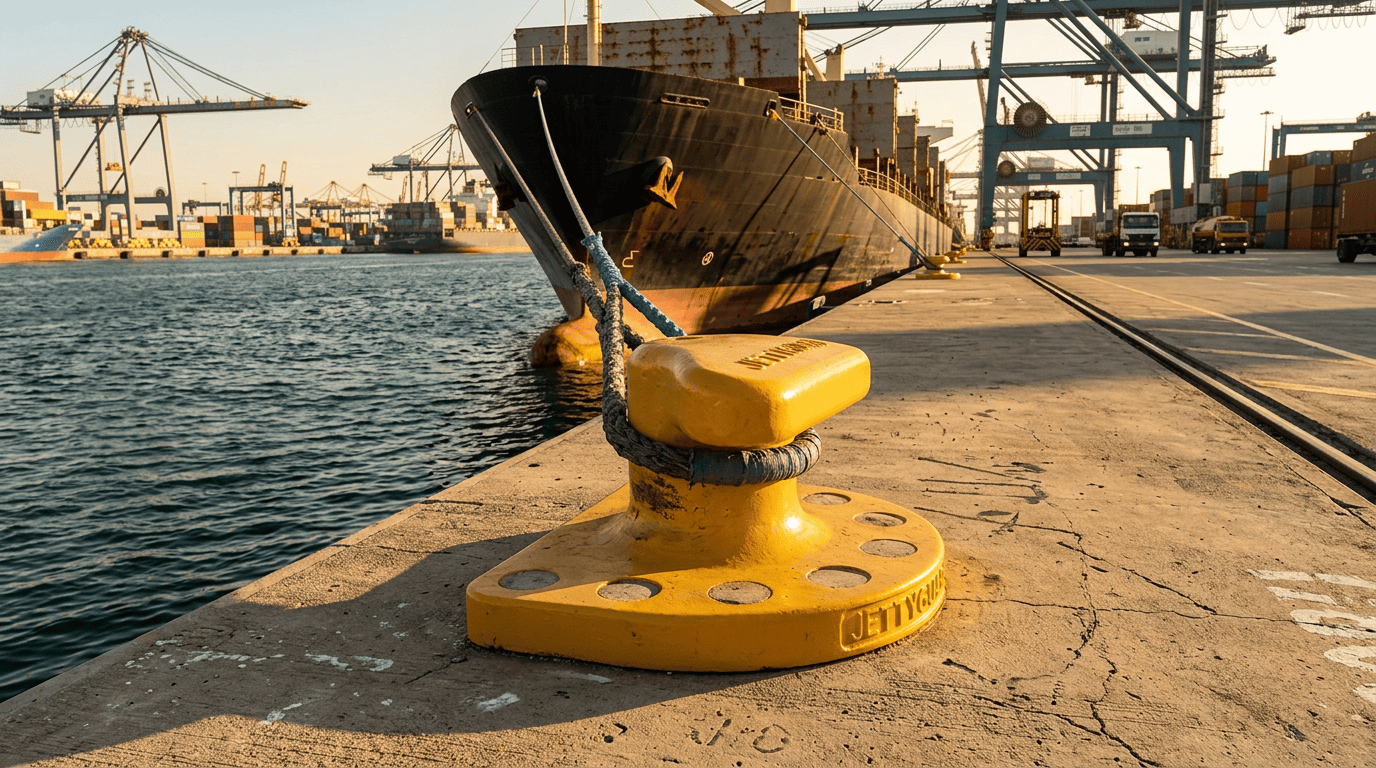
Selecting the wrong mooring bollard can lead to catastrophic failures and costly downtime. I know the pressure you face when balancing safety, budget, and project specifications.
To choose the right mooring bollard, you must calculate the Safe Working Load (SWL) based on vessel displacement1 and windage area. Prioritize material durability—Ductile Iron often outperforms Cast Steel in weight-to-strength ratio. Finally, consider the bollard type (T-Head, Single Bitt) that best suits your quay’s mooring angles and tidal variations.
Let’s dive into the technical details so you can make an informed decision for your next project.
How do I calculate the required Safe Working Load (SWL) for my vessel range?
Guessing the SWL is a risk no distributor or port owner should take. If you underestimate the load, you risk snapping lines or damaging the quay wall.
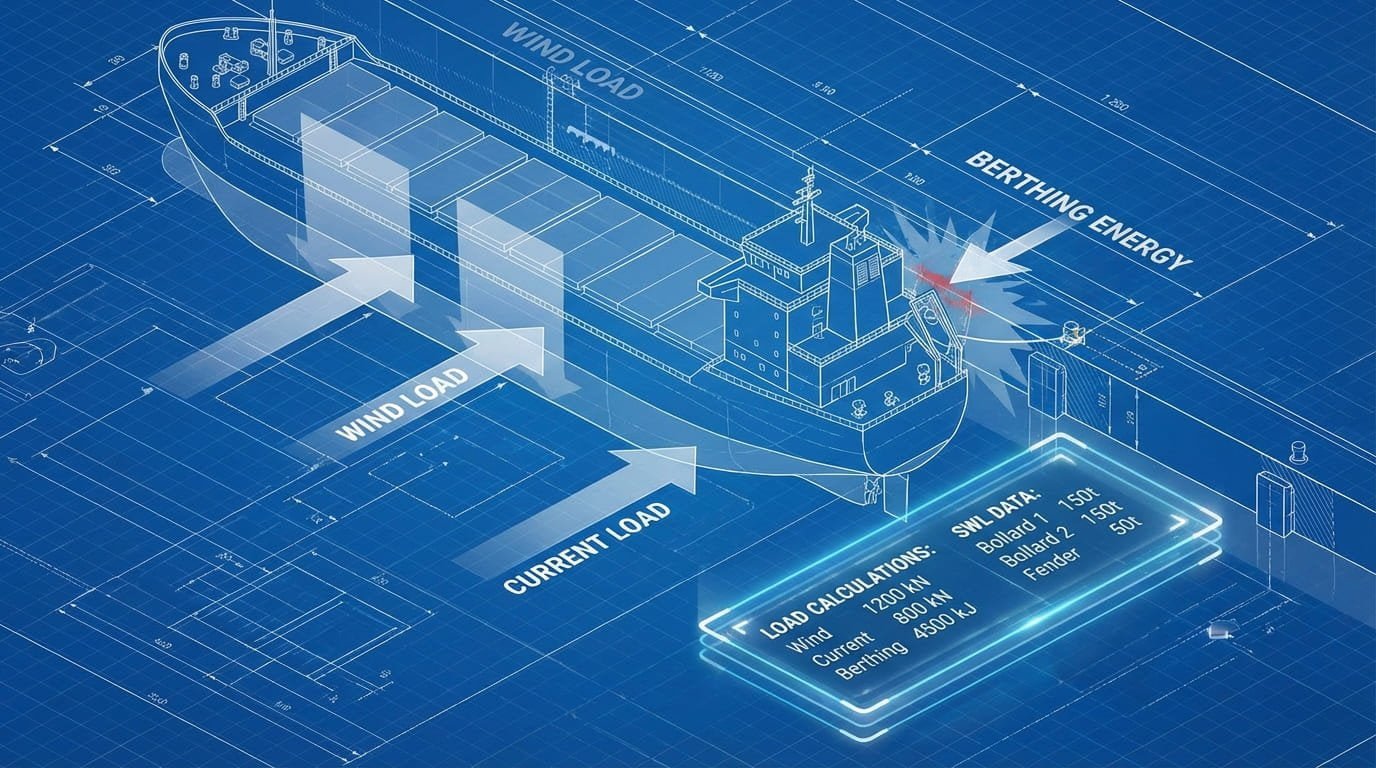
The required SWL is calculated by determining the maximum mooring load from the largest vessel expected to berth. This involves analyzing the vessel’s displacement, windage area2, and current forces. You should always apply a safety factor, typically 1.5 to 2.0, depending on international standards like BS 6349 or PIANC.
When I work with clients like you, I often see confusion around the exact calculations needed for a tender. It is not just about the ship's weight; it is about the forces acting on it.
Key Factors in Calculation
To get the SWL right, you need to look at three main things:
- Vessel Displacement: Heavier ships generate more momentum.
- Environmental Loads3: Wind and current can exert huge forces on the hull.
- Berthing Velocity: How fast the ship hits the fender affects the tension on the lines after berthing.
I have found that offering a preliminary strength calculation can be a game-changer. At Jettyguard, we provide strength calculations4 for the bollards we quote. This saves you time and gives your client confidence. It serves as a supplementary document that supports your bid, showing you have done your homework.
| Vessel Size (DWT) | Typical SWL Range (Tonnes) |
|---|---|
| < 10,000 | 10 - 30 |
| 10,000 - 50,000 | 30 - 80 |
| 50,000 - 100,000 | 80 - 150 |
| > 100,000 | 150 - 200+ |
What are the key differences between Cast Iron (Ductile) and Cast Steel bollards?
Choosing the wrong material can mean faster corrosion or unnecessary weight. You need a material that lasts long in harsh marine environments without breaking the bank.
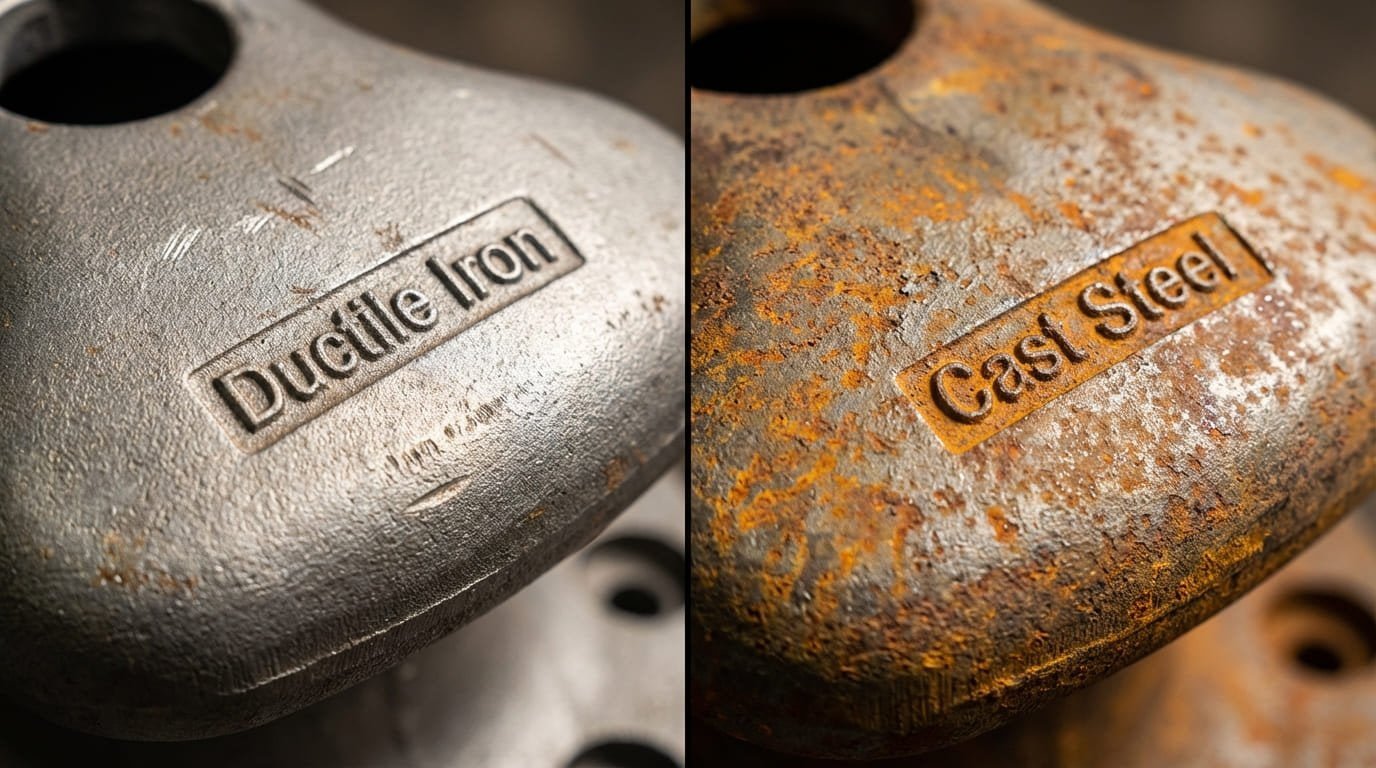
Ductile Cast Iron (Spheroidal Graphite)5 offers superior corrosion resistance and a better strength-to-weight ratio compared to Cast Steel. While Cast Steel is strong, it is more prone to rusting. Ductile Iron is generally the preferred choice for modern ports due to its durability and lower maintenance costs.
I have seen many specifications that still copy-paste "Cast Steel6" from old documents. This is often a mistake. Let me explain why based on my experience in the industry.
Mechanical Properties vs. Cost
Ductile Iron (SG Iron) has a lower density than steel, but its mechanical properties are often better for this application. It is strong but not brittle.
- Weight Control: If your project has strict weight limits for installation or shipping, Ductile Iron is the way to go.
- Cost: Yes, the material cost per ton might be higher for high-grade Ductile Iron. However, because it is stronger, we can use less of it to achieve the same SWL.
- Corrosion: Cast steel rusts faster. Ductile iron forms a patina that protects it.
Why I Recommend Ductile Iron
If you are looking for longevity, Ductile Iron is the winner. It handles the marine environment better. Unless the project strictly specifies Cast Steel for a particular reason (like extreme low-temperature impact requirements that exceed standard grades), I always suggest Ductile Iron. It is lighter, easier to handle, and lasts longer.
Which bollard type (T-Head, Single Bitt, or Kidney) is best for steep mooring angles?
Steep mooring angles can cause lines to slip off simple bollards. This creates a dangerous situation for the vessel and the crew on the dock.
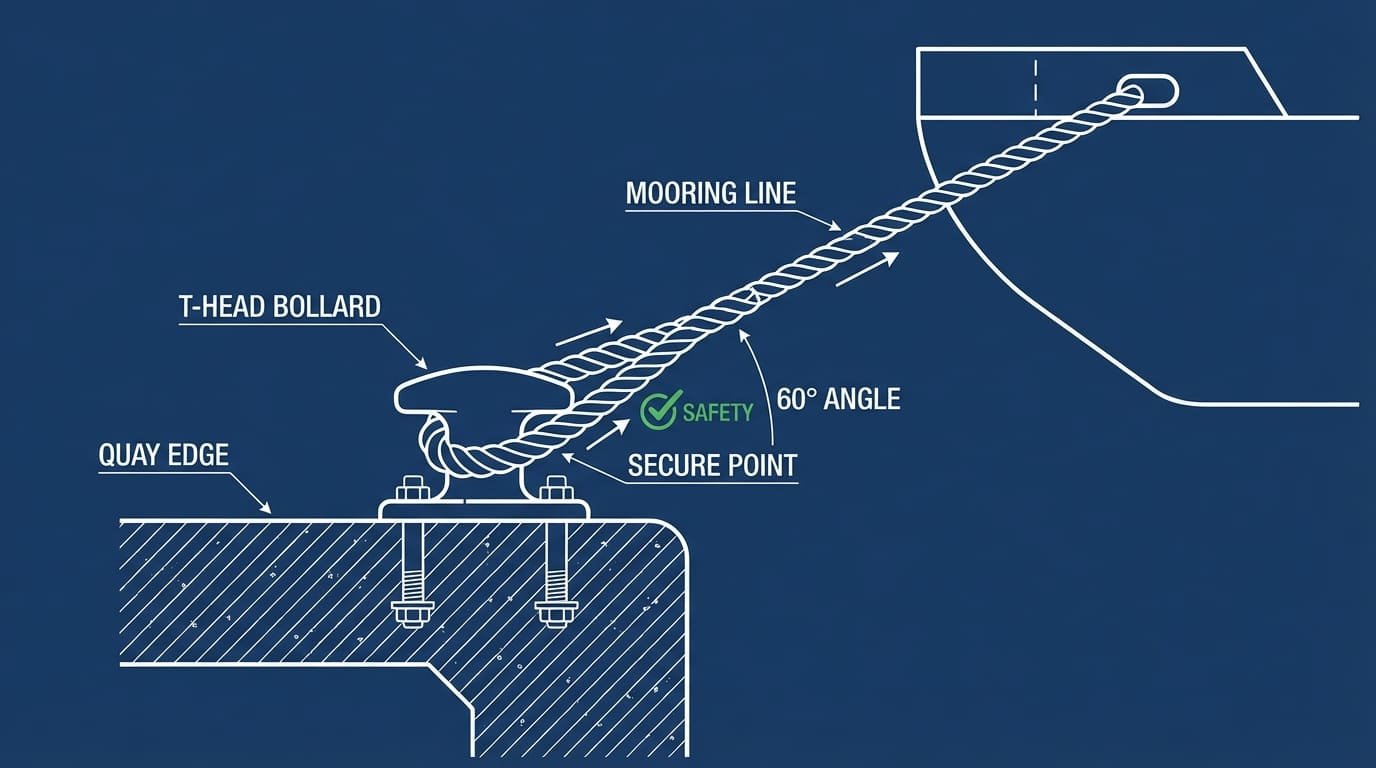
The T-Head bollard7 is the best choice for steep mooring angles. Its prominent "horns" prevent the mooring line from slipping off, even at high vertical angles. Single Bitt bollard8s are also effective but may require more deck space, while Kidney bollard9s are better suited for low-angle applications.
In my years of supplying fenders and bollards, the T-Head has become our number one seller. It is not just about the angle; it is about the overall efficiency of the design.
The Rise of the T-Head
The T-Head bollard is increasingly accepted worldwide. Why?
- Streamlined Design: It looks simple, but it is engineered to handle steep line angles effectively.
- High SWL, Low Weight: We can achieve a very high Safe Working Load with a relatively low bollard weight.
- Cost-Effective: Because it uses material efficiently, the total cost is often lower than bulky Single Bitt or Kidney types.
Comparing the Types
| Bollard Type | Best For | Steep Angle Performance | Footprint |
|---|---|---|---|
| T-Head | General Purpose, Multi-line | Excellent | Compact |
| Single Bitt | Narrow Quays | Good | Compact |
| Kidney | Small Vessels, Low Tide | Poor | Large |
If you have a project with large tidal variations or high freeboard vessels, go with the T-Head. It gives you the best performance for the price.
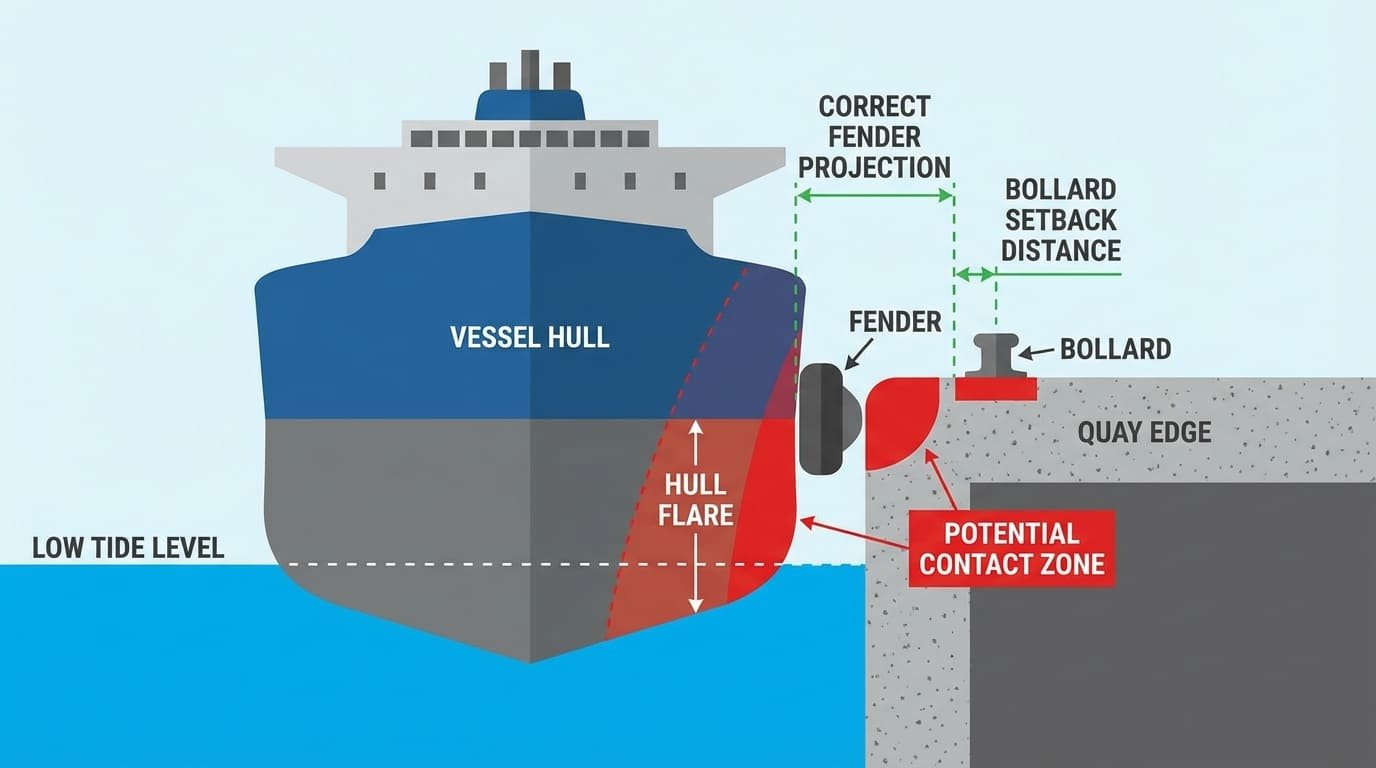
How does tidal range10 and hull overhang11 affect bollard selection?
Ignoring tides and hull shapes can result in lines chafing or snapping. You must account for the vertical movement of the ship relative to the quay.
High tidal ranges and large hull overhangs require bollards that can handle steep vertical line angles. You need a bollard with a large holding area and a shape that prevents line slippage. The spacing and position of the bollard relative to the fender line are also critical to avoid hull contact.
This is where the geometry of the port really matters. I often talk to distributors who focus only on the load, forgetting about the angles.
Managing Vertical Angles
When the tide is low and the ship is empty, the deck is high. The mooring line goes up at a steep angle.
- Hull Overhang: If the ship has a large flare (overhang), the line might rub against the quay edge if the bollard is set too far back.
- Bollard Shape: As I mentioned before, T-Head or Staghorn bollards are essential here. They "catch" the line.
Placement Strategy
You need to check the cross-section of the berth.
- Setback Distance: The bollard must be placed far enough back to be safe, but close enough to avoid line abrasion on the quay edge.
- Fender Projection12: The fender must push the ship out far enough so the hull overhang does not hit the quay or the bollard at low tide.
I always advise checking the "worst-case" scenario: Highest Astronomical Tide (HAT) with a loaded ship, and Lowest Astronomical Tide (LAT) with a light ship.
What are the standard spacing guidelines for mooring bollards on a quay?
Incorrect spacing can lead to unbalanced loads on the mooring lines. This puts excessive stress on specific bollards and risks line failure during storms.
Standard spacing typically ranges from 15 to 30 meters, depending on the vessel size. Smaller vessels may need spacing around 10-15 meters, while large cargo ships often require 20-30 meters. The goal is to ensure that mooring lines can be deployed at optimal angles (usually 30-45 degrees) to restrain the vessel.
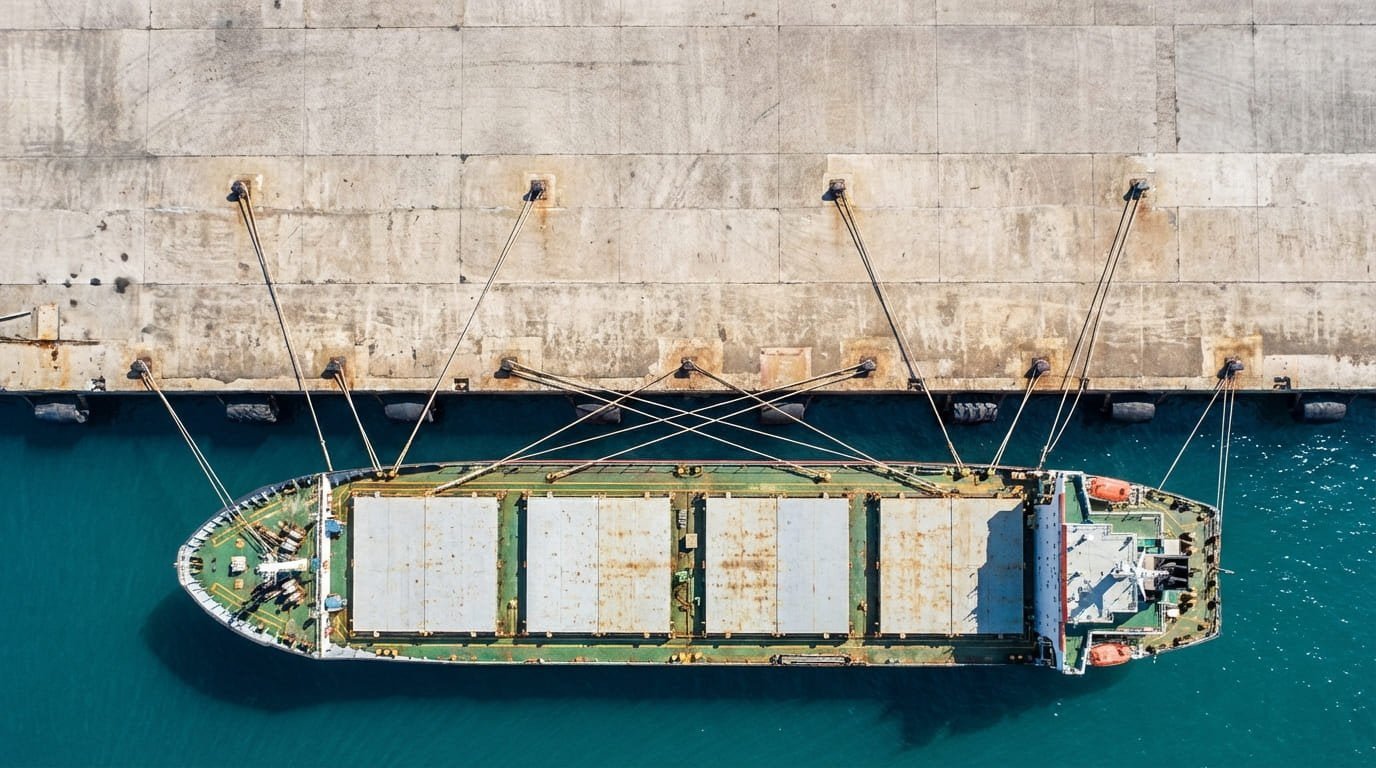
Spacing is not a random decision. It is dictated by the length of the vessels and the layout of the mooring lines (head, stern, breast, and spring lines).
General Rules of Thumb
- Continuous Quays: For multipurpose berths, a regular interval (e.g., every 20m) allows different sized ships to berth.
- Dedicated Berths: For specific terminals (like oil & gas), bollards are placed exactly where the ship's fairleads will be.
The Role of Line Angles
The spacing must allow the breast lines to be roughly perpendicular to the ship and spring lines to be nearly parallel.
- Too Close: Lines are too steep or have poor leads, reducing holding efficiency.
- Too Far: You might not have enough bollards to secure the ship safely.
When we supply bollards, we often review the quay layout. If I see a gap that looks too big, I will ask the client. It is better to catch these design errors early than to struggle during operation.
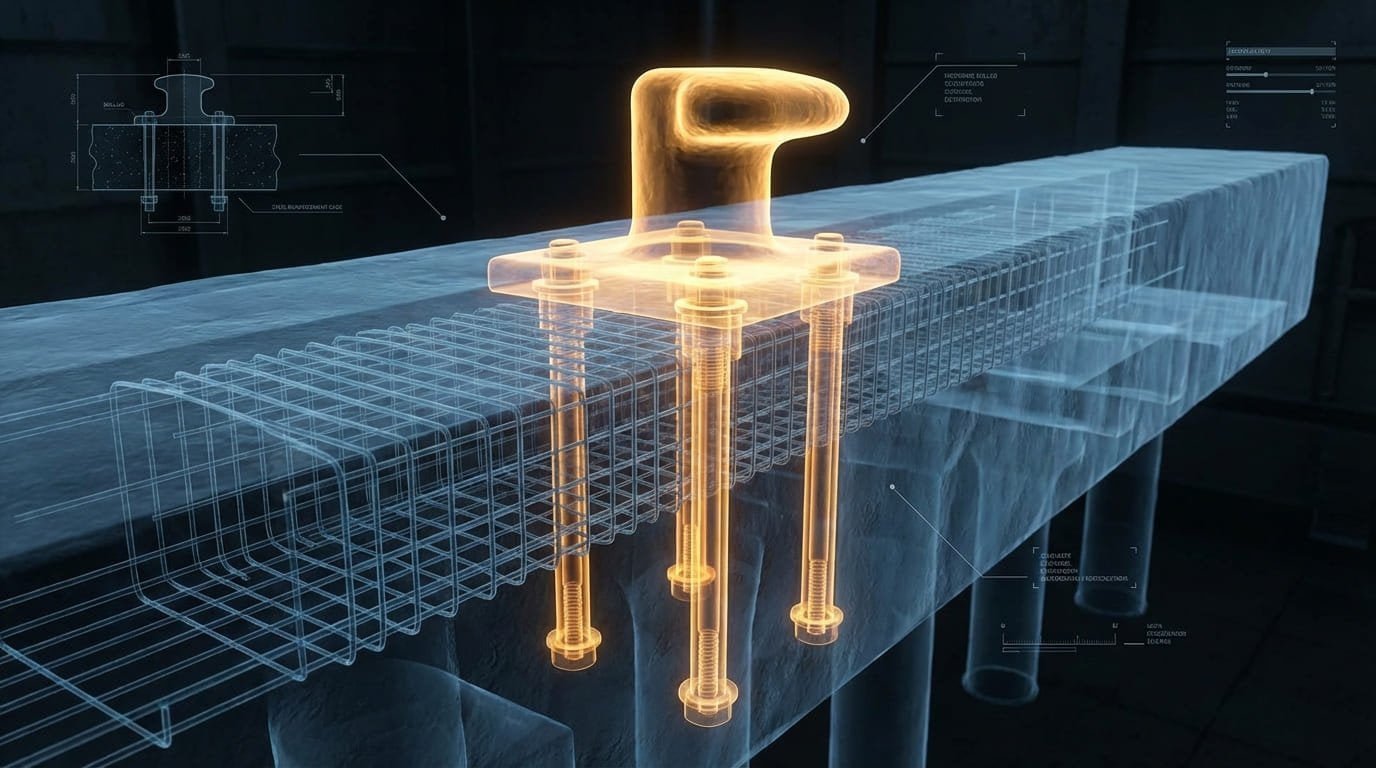
How do I evaluate anchorage and installation requirements for high-capacity bollards?
A strong bollard is useless if it rips out of the concrete. You must ensure the anchorage system can transfer the full load to the quay structure.
Evaluation starts with the pull-out capacity of the anchor bolts13. You must check the concrete grade, edge distance, and reinforcement depth. For high-capacity bollards, through-bolting or deep cast-in anchors are often required. Always verify that the anchor cages are compatible with the rebar layout of the quay.
Installation is often the biggest headache for contractors. I have seen projects delayed because the anchor bolts hit the rebar.
Types of Anchorage
- Cast-in Anchors: These are set before the concrete is poured. They offer the best strength but require perfect precision.
- Retrofit Anchors: Chemical or mechanical anchors used for existing quays. These are trickier for high loads (above 100T).
- Through-Bolts: Used on existing concrete decks where you can access the underside.
My Advice on Installation
Always ask for a template. When we ship bollards, we can provide steel templates to ensure the bolts are set correctly. Also, check the edge distance. If the bollard is too close to the edge of the quay, the concrete might shear off under load. We can help check these details during the design phase to prevent costly rework on site.
What international standards (OCIMF/PIANC) should my mooring bollards comply with?
Non-compliant bollards may be rejected by port authorities or insurance surveyors. You need to ensure your products meet recognized global safety standards.
Your mooring bollards should generally comply with OCIMF or PIANC guidelines14 (specifically WG 211). These standards define the safety factors, testing procedures, and material specifications. Compliance ensures that the bollard performs predictably under load and meets insurance requirements.

Navigating standards can be confusing. There are British Standards (BS), Japanese Standards (JIS), and others. But today, OCIMF and PIANC are the gold standards.
Why Standards Matter
- Safety Factors: PIANC recommends specific safety factors for different bolt types and materials.
- Geometry: OCIMF defines standard shapes and sizes to ensure compatibility with ropes.
- Testing: It is not just about design; it is about proof.
What We Do
At Jettyguard, we follow these standards strictly. We do not cut corners. If a tender asks for OCIMF, we provide a certificate of conformity. We also ensure that our Ductile Iron meets the specific grades required by these standards. It gives you peace of mind. When you sell to your client, you can say, "This is built to PIANC guidelines," and that ends the argument.
Conclusion
Selecting the right bollard involves calculating SWL, choosing durable Ductile Iron, and ensuring correct spacing and anchorage. Prioritize safety and standards to build a reliable, long-lasting mooring system.
Knowing vessel displacement helps engineers calculate accurate mooring forces for safe docking. ↩
Windage area affects lateral forces on a ship, impacting bollard load requirements during berthing. ↩
Environmental loads like currents and wind are vital factors in ensuring safe vessel mooring. ↩
Proper strength calculations build client confidence and prevent design underestimations. ↩
You’ll learn why SG Iron provides corrosion resistance and optimal strength for marine use. ↩
Research this to understand corrosion and maintenance differences between Cast Steel and Iron bollards. ↩
Exploring this will show how T-Head design improves line security and performance at high angles. ↩
Find out the best applications for Single Bitt bollards and how they suit narrow quays. ↩
Comparing Kidney bollards helps determine their suitability for small vessels and low angles. ↩
Understanding tidal variation ensures proper bollard design for safe mooring through height changes. ↩
You’ll learn how improper bollard placement can cause line chafing and structural damage. ↩
Fender projection prevents hull contact during low tides and improves overall safety. ↩
Exploring this ensures your anchorage system transfers loads safely to the quay structure. ↩
Review PIANC specifications to ensure compliance with international maritime engineering norms. ↩